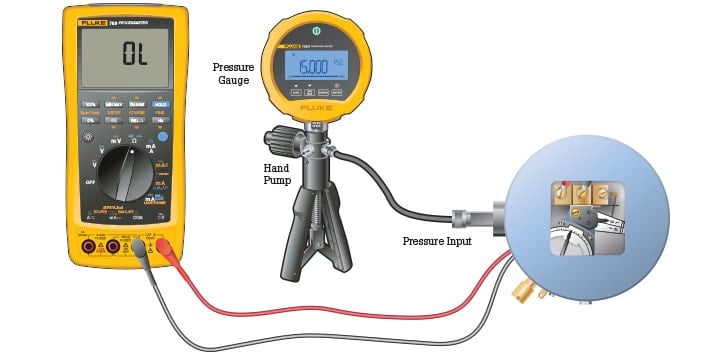
Accurate calibration of pressure switches is a critical step in ensuring process quality and the safe operation of equipment. The setup is similar to pressure gauge calibration except now a voltage or continuity across a set of switch contacts needs to be read either by a (Digital Multimeter) DMM or the calibrator. The purpose of the calibration is to detect and correct errors in the set point and deadband of the pressure switch. Calibrators can save you time by reducing steps and reducing the amount of equipment you have to bring to the job. With the right calibrator, the entire process can be automated.
To perform the test:
- Setup
- 1. Safely disconnect the device from the process it controls.
- 2. Connect the calibrator or DMM to the common and NO (normally open) output terminals of the switch. The DMM or calibrator will measure an "open circuit". if measuring continuity. If measuring V ac be sure the tool is properly rated for the voltage being measured.
- 3. Connect the pressure switch to a pressure source such as a hand pump connected to a gauge.
- Rising pressure
- 4. Increase the source pressure to the setpoint of the switch until the switch changes state from open to close. Manually record the pressure value when the DMM indicates a "short circuit" or if using a calibrator it will record the value for you.
- Falling pressure
- 5. Continue to increase the pressure until the maximum rated pressure. Slowly reduce the pressure until the switch changes state again, and resets from closed to open, then record the pressure.
- Calculation
- 6. The setpoint pressure was recorded when the pressure was rising. The deadband value is the difference between the rising setpoint pressure and the falling pressure reset point.